HOTP
Files for the HOTP Provider installation are located at axidian\Axidian Providers\Axidian HOTP Provider\<Version number>\.
- AuthProviders.HOTP-x64.msi: The installation package of HOTP Provider.
- \Misc: The folder contains policy templates.
About HOTP Provider
Use the autonomous one-time password generator eToken PASS for authentication in any applications and services that support RADIUS protocol, such as VPN, Microsoft ISA, Microsoft IIS, Outlook Web Access. The eToken PASS device has an algorithm of one-time password generation (One-Time Password – OTP). This algorithm is based on the HMAC and SHA-1 hash function. The OTP value calculation uses two input parameters: private key (initial value for the generator) and current value of the counter (the number of generation cycles required).
Initial value is stored both in the device itself and on the server in the Axidian system. The device counter is incremented with every OTP generation, and server counter increments with every successful authentication with OTP.
Install the provider
- To install HOTP Provider, run the AuthProviders.HOTP-x64.msi installer.
- After the installation is complete, restart the system. If the installation wizard prompts you to restart the system, confirm this action.
- To remove or restore the product, open the Control panel menu and use the standard procedure for the supported operating systems.
Add a device
A device can be registered for one user only.
To add a device, perform the following actions:
- Open Management Console.
- Switch to the Devices tab.
- Click Add.

You can also add a device from a file with device parameters on the From a file tab or manually on the Manually tab.
Add a device from file
On the From a file tab, click Select a file.
Select an XML file with device parameters.
Example
<Tokens xmlns:xsi="http://www.w3.org/2001/XMLSchema-instance">
    <Token serial="000200071927">
            <CaseModel>5</CaseModel>
            <Model>109</Model>
            <ProductionDate>11/4/2024</ProductionDate>
            <ProductName>Aladdin OTPO v1.0</ProductName>
        <Applications>
            <Application ConnectorID="{a61c4073-2fc8-4170-99d1-9f5b70a2cec6}">
            <Seed>884f20ce4b2c406e0b6199338990bb6cc3fabac403eaa7f8</Seed>
            <MovingFactor>1</MovingFactor>
            </Application>
        </Applications>
    </Token>
</Tokens>
Click Add.

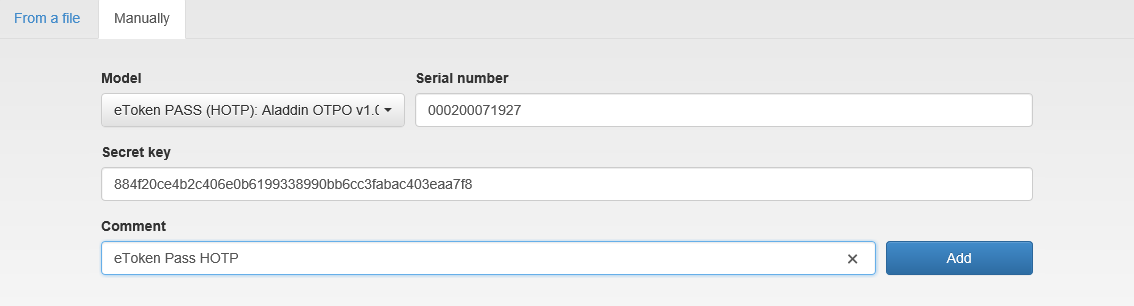
Add a device manually
- Open the Manually tab.
- In the Serial number field, specify the device serial number.
- In the Private key field, specify the private key generated by the device.
- Optionally, fill in the Comment field.
- Click Add.
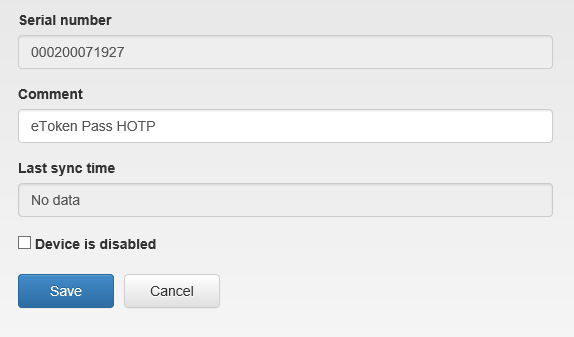
Modify a device
- Open Management Console.
- Go to the Devices tab.
- In the Authentication Provider field, select Hardware HOTP.
- In the Serial number field, specify the device serial number, if available, and perform the search.

- Select the located device and click the edit icon.

- Change the device serial number and the comment or deactivate the device. To save changes, click Save.
Remove a device
- Open Management Console.
- Go to the Devices tab.
- In the Authentication Provider field, select Hardware HOTP.
- In the Serial number field, specify the device serial number, if available, and perform the search.
- Select the located device, click Delete devices and confirm the removal.

Synchronize a device
- Open Management Console.
- Open the user profile with a registered device.
- Click Device settings and select Sync.
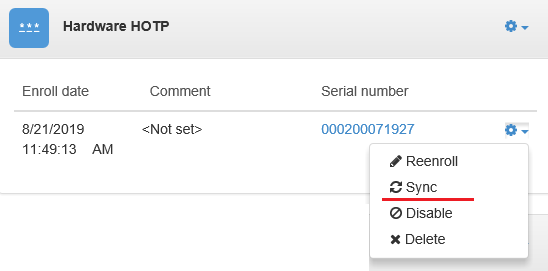
- Specify one-time passwords of the device and click Sync.
- Return to the user profile after the synchronization is completed successfully.
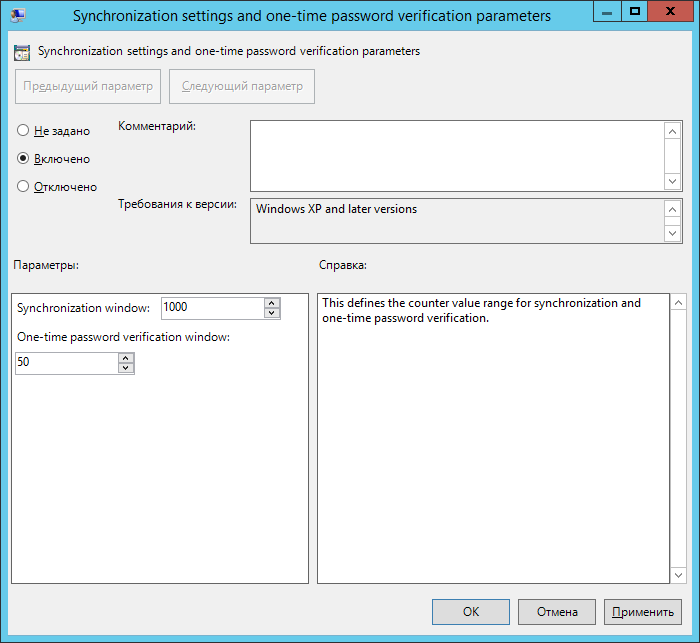
Synchronization settings and one-time password verification parameters
This policy defines the counter value range for synchronization and one-time password verification.
The default values are:
- Sync interval: 1000
- One-time password verification interval: 50