RDP File Signature Configuring
Configuring RDP file signing is performed on the management server with the Core component installed.
To enable signing, a PFX certificate issued by a certificate authority is required.
- Windows
- Linux
Configuring a certificate with thumbprint
Run PowerShell as administrator.
Open the Certificates snap-in using the command:
certlm.mscAdd the certificate to the computer's personal data storage.
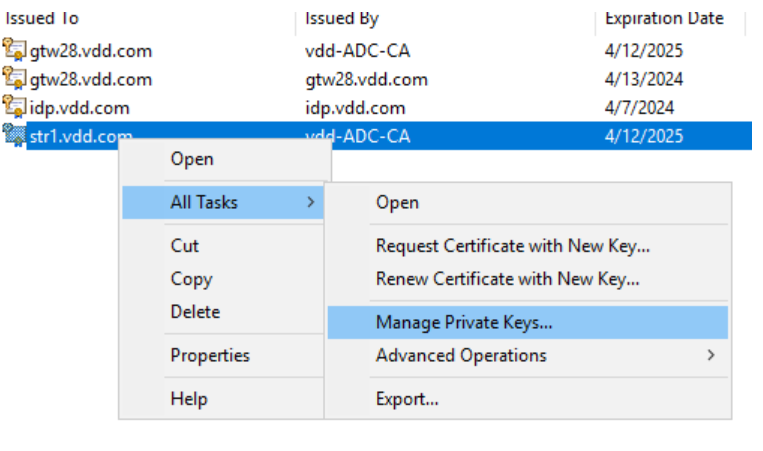
Right-click on the certificate and select All Tasks → Manage Private Keys.
Click Add.
In the window that opens, click Locations, select the local computer, and click OK.
In the text field, enter the name
IIS_IUSRS, click OK, and then Apply.
Double-click on the certificate and go to the Details tab.
In the list, find the Thumbprint field and click on it.
Copy the certificate thumbprint value without spaces.
Editing the configuration file
Open the appsettings.json configuration file of the Core component in an editor, which is located at the path:
C:\inetpub\wwwroot\core\appsettings.json{
"Rdp": {
"UseRemoteApp": false,
"SignRdpFile": true,
"Certificate": "16c214ba7dec702a7ce5e4ac727502b0c0d448e2",
"Password": ""
}
}Edit the
RDPsection::- For the
SignRdpFile, set the value totrue(enable RDP file signing). - For the
Certificatespecify the certificate thumbprint.
- For the
Save the changes.
Restarting the Core component
After editing the configuration file, you need to restart the Axidian Privilege Core component.
Run PowerShell as administrator.
Restart the Core application pool:
C:\Windows\System32\inetsrv\appcmd.exe recycle apppool Axidian.Privilege.Core
Configuring a certificate with key import
Copy the certificate to the folder /etc/axidian/axidian-privilege/keys/core/
Open the configuration file appsettings.json of the Core component in an editor, which is located at:
/etc/axidian/axidian-privilege/core/appsettings.json{
"Rdp": {
"UseRemoteApp": false,
"SignRdpFile": true,
"Certificate": "/etc/axidian/axidian-privilege/keys/core/rdp-sign.pfx",
"Password": "1234"
}
}Edit the
RDPsection:- For the
SignRdpFilekey set the value totrue(enable RDP file signing). - For the
Certificatekey, specify the path to the certificate. - For the
Passwordkey, specify the password that was set when exporting the certificate.
- For the
Save the changes.
Navigate to the folde /etc/axidian/axidian-privilege/scripts/ with elevated privileges:
sudo -icd /etc/axidian/axidian-privilege/scripts/Reset permissions on files with the script:
bash set-permissions.sh
Restarting the Core component
After editing the configuration file, you need to restart the Axidian Privilege Core component.
Navigate to the folder /etc/axidian/axidian-privilege/scripts/ with elevated privileges:
sudo -icd /etc/axidian/axidian-privilege/scripts/Restart the Core component with the script:
bash run-pam.sh