Data storage
For Axidian Access, you must create and configure the following databases:
- For the Core Server component.
- For the Log Server component.
- If you plan to use the Axidian Key mobile application, you need a separate database for the Key Server component.
Also, you must create a service user that can perform requests for reading and writing information.
Axidian Access supports Microsoft SQL and PostgreSQL databases.
- Microsoft SQL
- PostgreSQL
On the server with Microsoft SQL Server installed, create two databases: one for Core Server, the other one for Log Server. Also, create a service account.
Create a database
To create a database, perform the following actions:
Open SQL Server Management Studio and connect to the server.
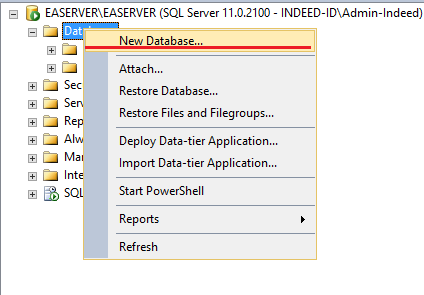
Right-click the Databases node.
In the window that opens, select New Database.
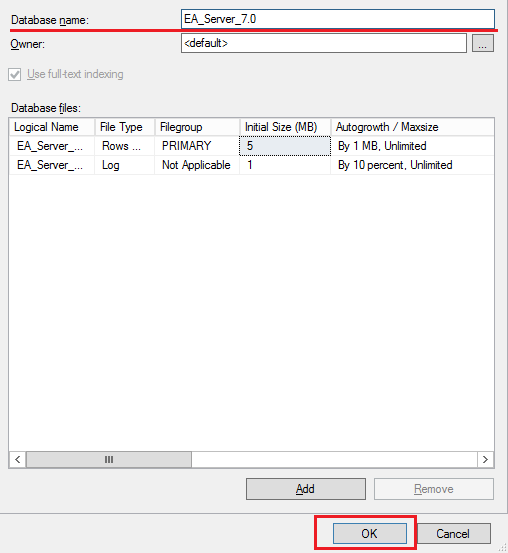
Enter the name of the new database and click OK.
Create a service account
Axidian Access supports service accounts with Windows authentication mode and with SQL Server authentication mode.
When creating a service account, disable mandatory password change at next login and password expiration. Otherwise, when the password expires, Axidian Access components will not be able to access the database, which will cause failures.
Create a service account with SQL Server authentication mode
To create a service account with SQL Server authentication mode, perform the following actions:
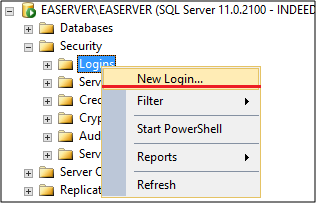
Expand the Security node.
Right-click the Logins node.
In the window that appears, select New Login.
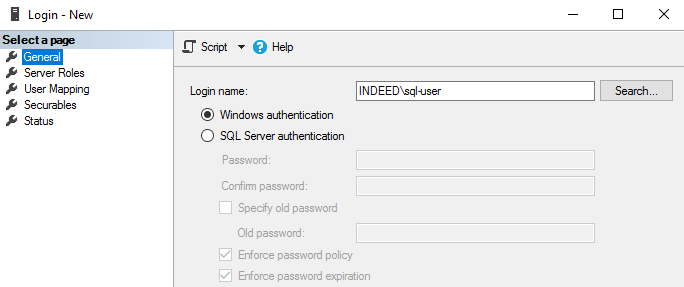
In the Login - New window, perform the following actions:
- Enter the user name.
- Select the SQL Server authentication check box.
- Clear the Enforce password Policy check box.
- In the left menu, select User Mapping.
- Select the previously created databases.
- For each database, select the db_owner role and click OK.
Enable mixed authentication:
- Right-click the SQL Server instance node and select Properties.
- On the Security page in the Server authentication section, select SQL Server and Windows Authentication mode.
Verify that the service account has the following setting enabled:
- Right-click the created account and select Properties.
- On the Status page in the Login section, select Enabled.
Open Sql Server Configuration Manager and enable the TCP/IP protocol:
- On the Native client SQL tab, select Client protocols.
- Right-click TCP/IP, select Properties and set the value to Yes to enable the TCP/IP protocol.
- Enable TCP/IP in all Native client SQL Client Configuration tabs.
Create a service account with Windows authentication mode
To create a service account with SQL Server authentication mode, perform the following actions:
Create a domain account.
Open SQL Server Management Studio and connect to the server.
Expand the Security node.
Right-click the Logins node.
In the window that appears, select New Login.
In the Login - New window, perform the following actions:
Find the previously created user.
In the left menu, select User Mapping.
Select the previously created databases.
For each database, select the db_owner role and click OK.
In a text editor, open the configuration file of the component for which you are creating the database:
- The file for Core Server is located in C:\inetpub\wwwroot\am\core\Web.config.
- The file for Log Server component is located in C:\inetpub\wwwroot\ls\targetConfigs\sampleDb.config.
In the
connectionStringtag, specify the valueIntegrated Security=SSPI.Example for Core Server<mssqlDbContexts>
<mssqlDbContext connectionString="Data Source=SERVER\SQLEXPRESS;Initial Catalog=am8;Integrated Security=SSPI" id="mssql" />
</mssqlDbContexts>Example for Log Server<Settings>
<ConnectionString>Data Source=SERVER\SQLEXPRESS;Initial Catalog=Log81;Integrated Security=SSPI</ConnectionString>
</Settings>Save the configuration file.
Next, configure the application pools in Internet Information Services.
- Start IIS Manager.
- Click Application Pools and select:
- Axidian.Core for Core Server.
- Axidian.LS for Log Server.
- In the Actions section, select Advanced Settings.
- In the Advanced Settings window, find the Identity parameter and click the button on the right.
- In the Application Pool Identity window, select Custom account and click Set.
- Specify the service account with the domain and click OK.
- In the Actions section, restart the application pool for which the setting is configured, and open the application start page in IIS.
- Select the customizable Axidian server component in IIS.Information
If the setting is configured for both Core and Log Server, perform these steps for each component.
- In the Management section, select Configuration Editor and open system.webServer/security/authentication/windowsAuthentication.
- For the
useAppPoolCredentialsparameter, set the value toTrueand in the Actions block, click Apply. - Restart IIS.
On the server with PostgreSQL Server installed, create two databases: one for Core Server, the other one for Log Server. Also, create a service account.
If the databases and Core Server are located on different machines, you must configure remote connection to the database.
Create a service account
To create a service account, perform the following actions:
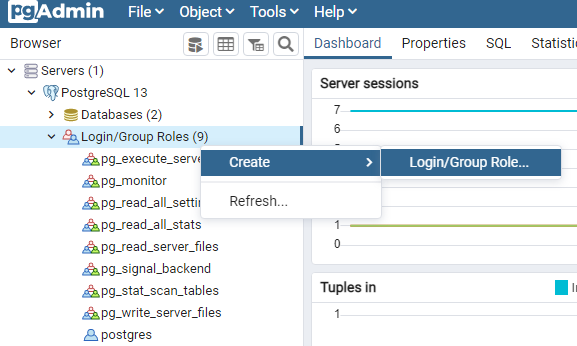
Open pgAdmin and connect to the server.
Right-click Login/Group Roles and select Create → Login/Group Role.
In the Create-Login/Group Role window, perform the following actions:
On the General tab, in the Name field, enter the user name.
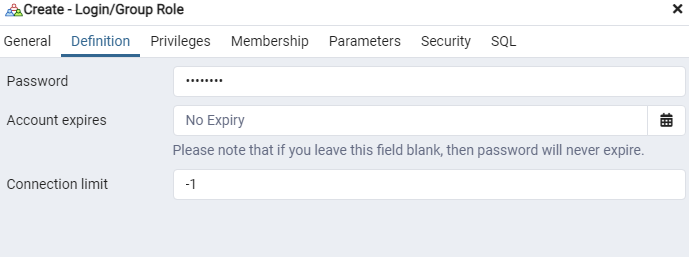
On the Definition tab, in the Password field, enter the password. In the Account Expires field, specify the value No Expiry.
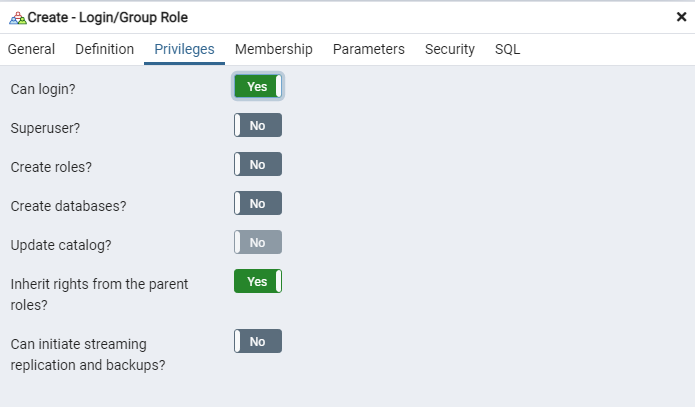
On the Privileges tab, select the Can login? check box and click Save.
Create a database
To create a database, perform the following actions:
Open pgAdmin and connect to the server.
Expand the components of your SQL server.
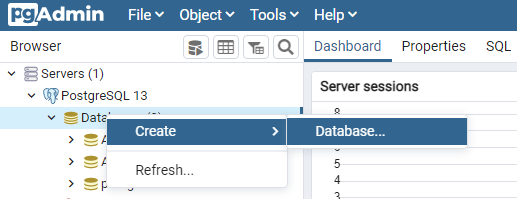
Right-click Databases.
Select Create → Database.
In the Create-Database window, perform the following actions:
- In the Database field, enter the database name.
- In the Owner field, select from the list the previously created user and click Save.
Configure remote connection to the database
To configure remote connection to the database, perform the following actions:
Open the configuration file pg_hba.conf from C:\Program Files\PostgreSQL<version number>\data.
Add a string in the following format:
host databaseName UserName HostIP md5Where:
host: Connection type. If you do not specify a connection type, the TCP/IP connection is used by default.databaseName: Name of the database for which you are configuring the connection.UserName: Name of the user who connects to this database.HostIP: IP address of the machine on which the Axidian component is installed. Specify the value with a mask.md5: User authentication method.Examplehost all all 192.168.1.0/24 md5
Open the configuration file postgresql.conf from C:\Program Files\PostgreSQL<version number>\data.
Change the string
listen\_addresses = 'localhost'tolisten\_addresses = '\*'.